-
 Heraut Louis authoredd94f6496
OhmPi V 2.00 (64 electrodes and 12V)
Warning
Ohmpi is a participative project open to all, it requires skills in electronics and to respect the safety rules. Ohmpi must be assembled in a professional context and by people competent in electronics. The Ohmpi team cannot be held responsible for any material or human damage which would be associated with the use or the assembly of OHMPI. The Ohmpi team cannot be held responsible if the equipment does not work after assembly.
Note
In this version, we have developed two new board types that allow the assembly of Ohmpi v2.00, a measurement board and a multiplexer board. This new version is made up of:
- A measurement board for four-point measurement
- 4 multiplexer cards
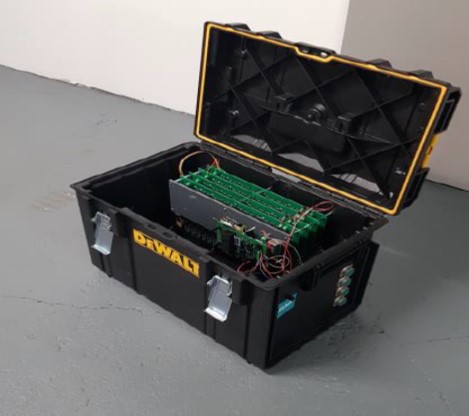
- A box
The philosophy of Ohmpi 2
The philosophy of Ohmpi V2.00 is to offer a new DIY multielectrode resistivity meter. It is a resistivity meter with 64 electrodes , which can be upgraded to 128 electrodes. It is limited to low-current injection,but suitable for small laboratory experiments and small field time-lapse monitoring. Ohmpi, is developed by a team that seeks to share all its experience and wishes to improve and offer a more and more robust tool to the community.Ohmpi V2.00 is a completely different version from the previous one. We will stop the development on the previous version, to dedicate our efforts on this new version.
Technical data
| Parameter | Specifications V1 | Units | Specifications v2 | Units |
|---|---|---|---|---|
| Electrodes | 32 | 64 to 128 | ||
| Operating temperature | -0 to 50 | °c | -25 to 50 | °c |
| Power consumption of CPU and control system | 18.5 | W | 18.5 | W |
| Voltage injection | 12 | V | 12 | V |
| Battery | 9 | V | 12 | V |
| Current | 0 to 40 | mA | 0 to 40 | mA |
| Min pulse duration | 150 | mS | 150 | mS |
| Input impedance | 80 | Mohm | 80 | Mohm |
| Data storage | micro SD card | micro SD card | ||
| Resolution | 0.01 | ohm | 0.01 | ohm |
Ohmpi 2 step by step
Interfaces and applications
Different interfaces can be used to communicated with the OhmPi.
Web interface
The raspberrypi of the OhmPi is used as a Wifi Access Point (AP) and run a small webserver to serve the 'index.html' interface. Using a laptop or a mobile phone connected to the wifi of the Raspberry Pi, one can see this interface, upload sequence, change parameters, run sequence and download data.
To configure the Raspberry Pi to act as an access point and run the webserver automatically on start, see instructions on raspap.com and in 'runOnStart.sh'.
Once configure, the webserver should start by itself on start and once connected to the Pi, the user can go to 10.3.141.1:8080 to access the interface.
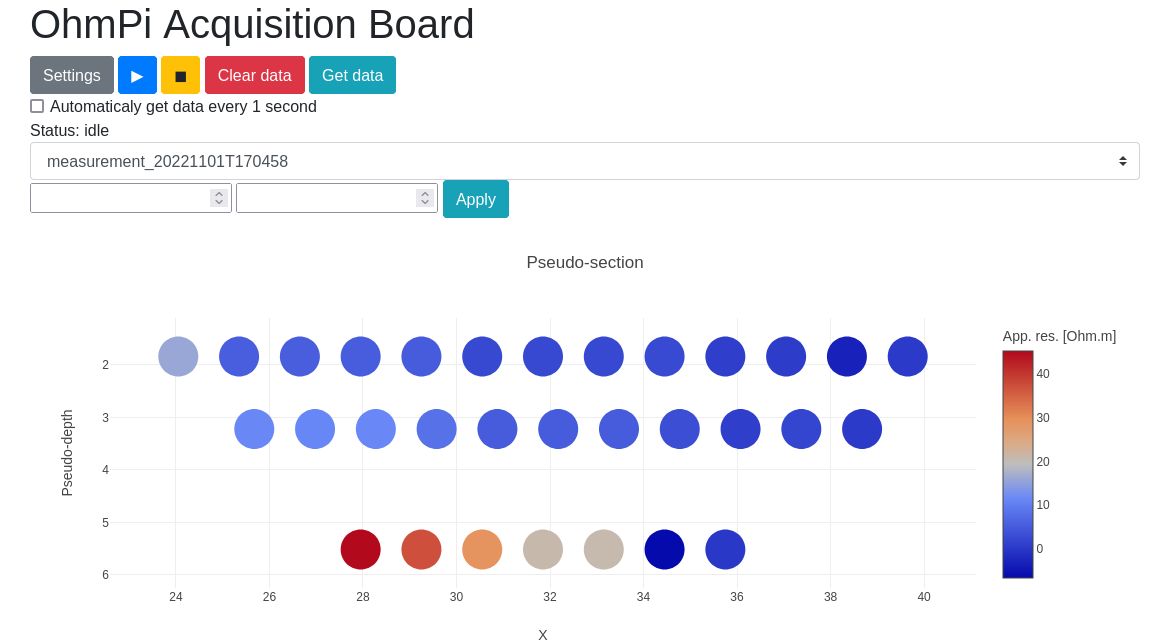
Web interface with its interactive pseudo-section.
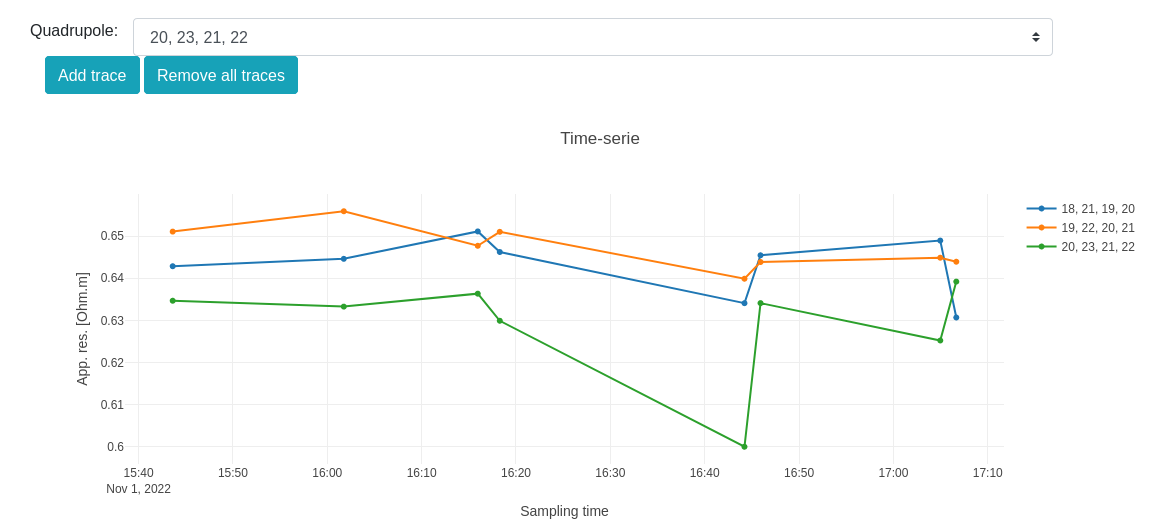
Evolution of quadrupole apparent resistivity with time.
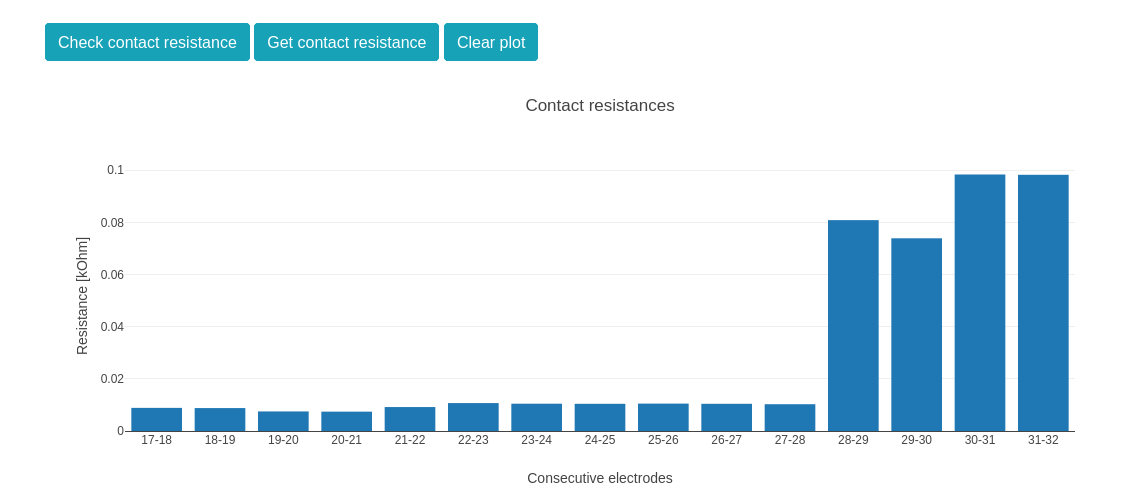
Contact resistance check.
Python interface
By importing the OhmPi class from the ohmpi.py, one can controle the OhmPi using interactive IPython. Typically, it involves using the Thonny on the Raspberry Pi or the Terminal. Once can also connect using ssh and run the Python interface (see PuTTY on Windows or ssh command on macOS/Linux).
To access the Python API, make sure the file ohmpi.py is in the same directory as where you run the commands/script. The file ohmpi.py can be found on the OhmPi gitlab repository. We recommend downloading the entire repository as ohmpi.py import other .py files and default configuration files (.json and .py).
*MQTT interface*
Interface to communicate with the Pi designed for the Internet of Things (IoT). This interface allows to control a single OhmPi, a network of OhmPis, or auxilliary instruments remotely through an MQTT broker. An example of MQTT broker that can be used is Mosquitto. Depending on the experiment needs, MQTT brokers can be set up locally on the Raspberry Pi, on a master Raspberry Pi or on a local or remote server. Commands are received by ohmpi.py script via the mqtt_interface.py script and further processed. All commands are sent in JSON format following the Python API with args and kwargs: